
In this article, we’ll walk through a step-by-step process to add Cloud of Worship to your vMix setup using the livestream URL.
Cloud of Worship is a fantastic tool for your church to display lyrics, scriptures, and other multimedia content seamlessly, and integrating it with vMix makes it even more powerful for live broadcasts.
To keep this guide easy to follow, let's break down each step and include tips to help you configure the integration without any hassle. Here are the highlighted steps:
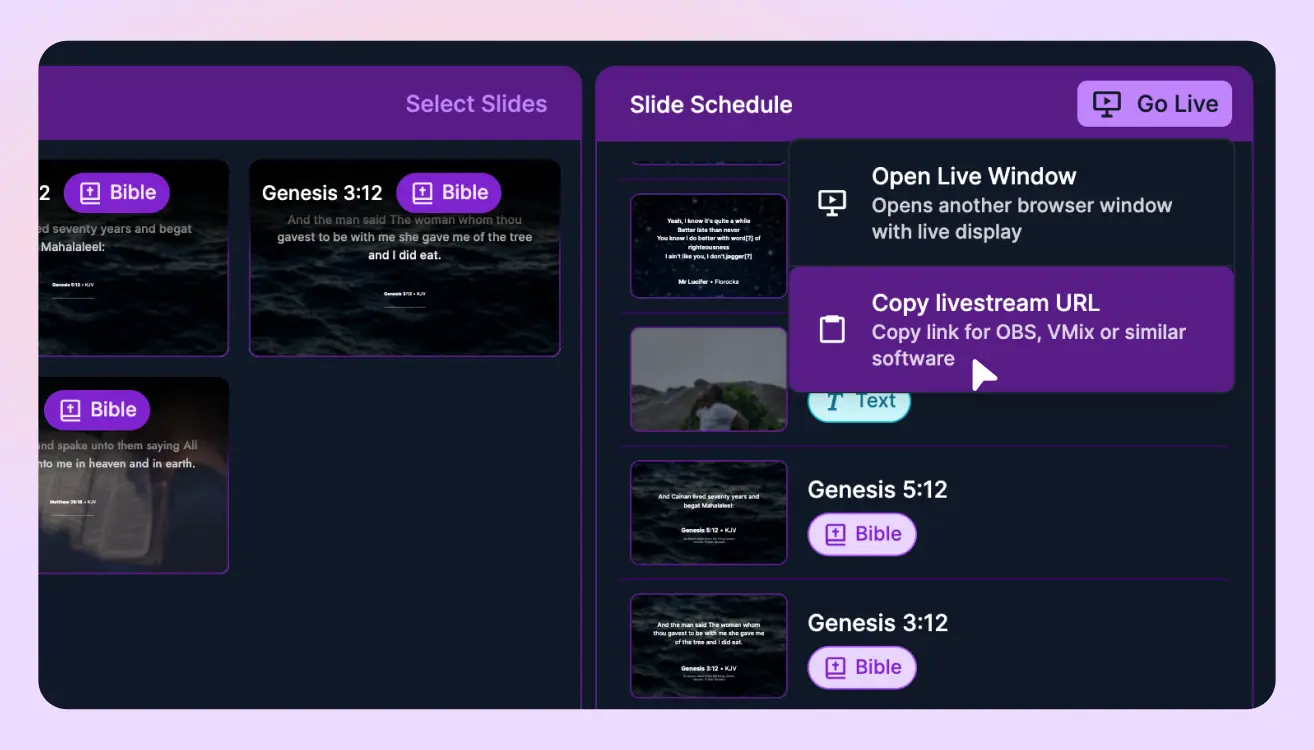
- Open Cloud of Worship and copy livestream URL
- Open vMix and add a new Web Browser Input
- Configure the Web Browser Input
- Test your setup
Step 1: Open Cloud of Worship and Copy Livestream URL
- Log into Cloud of Worship: Start by logging into your account at app.cloudofworship.com.
- Find the Livestream URL: Once logged in, navigate to the Livestream section. Here, you’ll see the URL for your live worship stream, which should look similar to this format: app.cloudofworship.com/livestream/livestream_id, Copy this URL, as you’ll need it shortly.
Step 2: Open vMix and Add a New Web Browser Input
- Launch vMix: Open your vMix software on your computer. Ensure you have an updated version to avoid compatibility issues.
- Add Input: In the lower left corner, click on the Add Input button. This will bring up the “Add Input” menu, allowing you to add different types of media sources.
Step 3: Configure the Web Browser Input
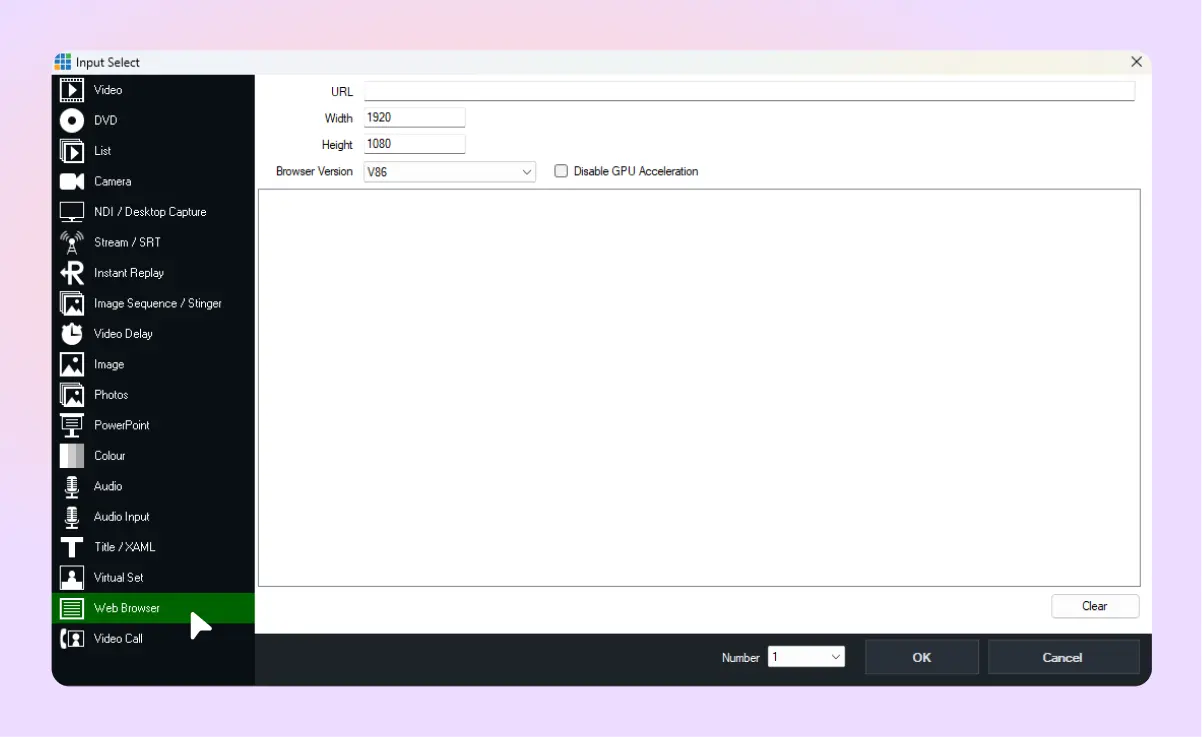
- Select Web Browser: In the Add Input menu, choose the Web Browser option from the list. This will allow you to add the Cloud of Worship stream as a browser source within vMix.
- Paste the URL: In the URL field, paste the livestream link you copied earlier from Cloud of Worship.
- Adjust Resolution (Optional): In the settings, you may want to set the resolution to match your livestream quality. Typically, a resolution like 1280x720 or 1920x1080 works well for worship lyrics and other presentation content, for lower thirds, you can adjust the width to be much larger than the height.
- Apply Changes: Once you’ve pasted the URL and adjusted the resolution (if needed), click OK to save and add the source to vMix.
Step 4: Test Your Setup
- Preview the Stream: Click on the Cloud of Worship input to preview it on vMix. Ensure that the lyrics, verses, or any content display as expected.
- Go Live: Once you’re happy with the setup, you can broadcast via VMix! The Cloud of Worship stream will appear seamlessly in your broadcast, and you can always control it in your Cloud of Worship Control Center.
Tips for a Smooth Experience
- Ensure Network Stability: Streaming from Cloud of Worship requires a stable internet connection to avoid delays or disconnections—not necessarily fast but stable.
- Adjust Audio (If Applicable): If you’re streaming audio from Cloud of Worship, double-check audio levels in vMix to maintain balanced sound quality.
- Use Hotkeys (Advanced): If you frequently switch between different inputs, consider setting up hotkeys in vMix to toggle Cloud of Worship on and off quickly.
Known Issues and Limitations
While Cloud of Worship integrates smoothly with VMix for displaying lyrics and a variety of content, there are a few known limitations to be aware of.
Currently, certain features like countdown slides and video slides do not function as expected when used through the livestream URL.
For now, it’s best to handle countdowns or video segments using the desktop capture input or through alternative sources until these limitations are addressed in future updates.
Conclusion
Integrating Cloud of Worship into vMix is a straightforward process that enhances your live broadcasts with engaging on-screen content for your congregation.
By using the livestream URL in a web browser input, vMix lets you seamlessly merge Cloud of Worship with other media elements, creating a professional and dynamic live stream setup.